This article shows you how to create a new user in AutoPlay, and explains each field and setting on the user record.
Before you start
You need the User Admin role to create a user. As a manager in the User Admin role, you can view My Users in the left hand navigation menu under Settings > Company Settings. You can also reach it from the shortcut menu next to your user details, top right of the screen.
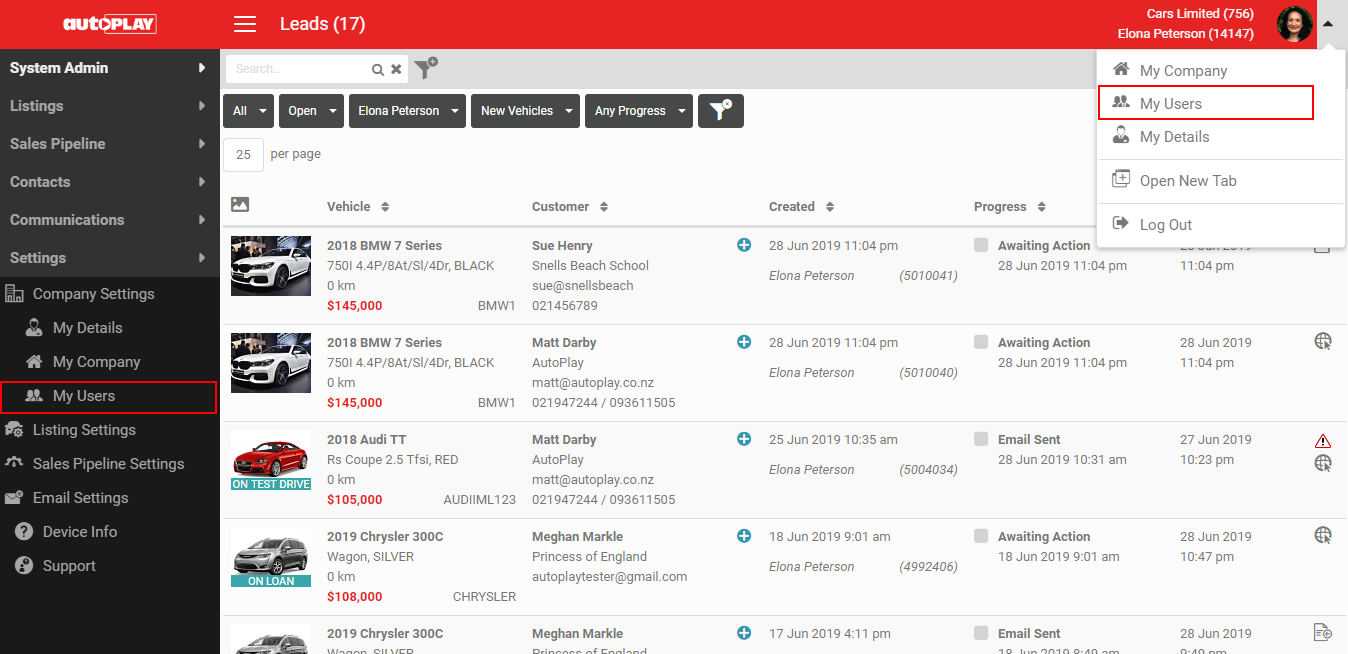
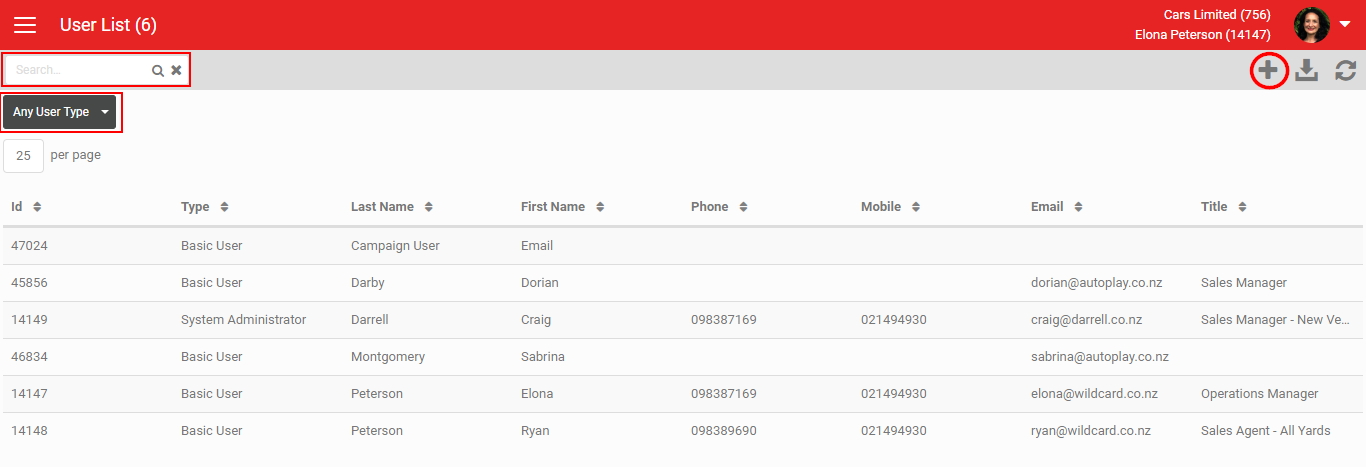
On the My Users screen you can see every user in the account, but you can only edit the ones you manage. Download a list of users with the Download button in the grey action menu. Search by User ID, last name, first name, phone, mobile, email or title, and click any column heading to sort.
The User Type dropdown filters users by access level:
- System Admin: legacy setting being phased out. Controls EMD-specific menus (enables Email, Contact, Listing and Vehicle Registry menus) and enables the Trade Me checkbox on the Listing Detail screen.
- Data Admin: legacy setting being phased out. Enables the Trade Me checkbox on the Listing Detail screen.
- Basic User: no functional effect. Visual cue that a user is not a manager.
- View Only: the user can view whatever they are set up to see through Role Management, but cannot edit anything. Their name still appears in user dropdown lists.
- No Access: the user cannot log in, but their name still appears in the user dropdown on a lead if that lead is still assigned to them, and in reporting.autoplay.co.nz. The lead stays assigned to them, but they do not appear in user allocation lists.
- Deleted: the user cannot log in, their name does not appear in any list or dropdown, and any leads assigned to them become Not Allocated.
1. Details
- Choose the User Type (AutoPlay users only).
- Add the user's first name (required), last name and email address (required). The email address is used for login, and is enough on its own to create the account, but complete as much as you can: this information feeds email templates, so title, phone and mobile also help present a professional face to customers.
- Use the Location field to record where the user is based (free text).
- AutoPlay users can also enter a Code, used to map leads across accounts when using Lead Allocation.
- If you have a DMS or other third-party integration, complete Ref Code and VMS Code too. These are critical to records being assigned to the correct user.
- Dept Code maps leads to the user's department from your CRM or DMS.
- User PIN is used when checking for similar customers on a Test Drive Kiosk.
- Completed AutoPlay Academy is editable by AutoPlay staff only, and shows whether the user has finished the Academy.
- Send Welcome Email is visible to AutoPlay staff only.
2. Account preferences
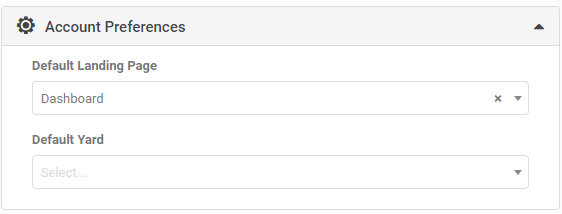
Choose a Default Landing Page, the screen the user sees on first login. If the dealership uses Sales Pipeline, set this to Dashboard. The options in this dropdown depend on which roles exist at the dealership, so you will not see Dashboard listed if the account has no Sales Pipeline access.
You can also set a Default Yard from the yards set up for the dealership. This determines which yard the Dashboard and Listings screens default to, though the user can still filter to other yards. There is no role restriction on this dropdown: it shows every yard set up in the account, regardless of the user's own yard access.
When a user creates a lead with no listing attached, that lead defaults to their Default Yard.
3. Sales Pipeline preferences
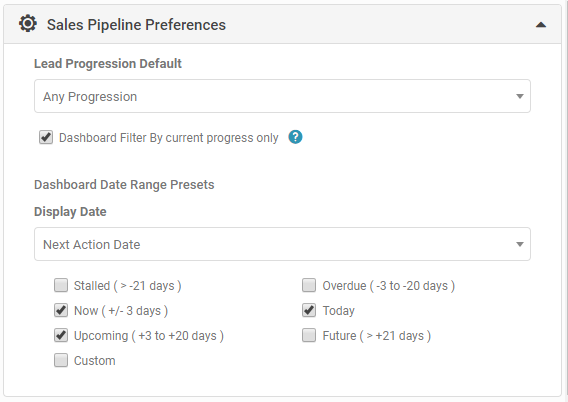
Progression controls whether the user's Dashboard initially shows leads already being worked on, or all leads. The default is Any Progression. You can also set it to:
- New Leads: the Dashboard initially shows only brand new leads nobody has edited yet.
- In Progress: the Dashboard initially shows only leads a user has already updated.
Default leads filter to me is for lead managers. When ticked, the user can still see leads for anyone they share the Manage Leads role with, but the Dashboard opens filtered to their own name (they can switch to other users with the User dropdown). When unticked, the Dashboard opens showing all leads for every user they manage. When the Dashboard default is set to All Users, the logged-in user's own name appears directly under the All Users option.
Dashboard Filter By Current Progress Only controls whether the Progress filter shows only the stage a lead is currently at in the road to the sale, or every stage the lead has previously passed through.
Dashboard Date Range Presets set what the Dashboard filters to on open. By default the Dashboard filters by Next Action Date, the date scheduled for the next follow-up. With Next Action Date selected, you can tick any combination of:
- Stalled (more than 21 days)
- Overdue (-3 to -20 days)
- Now (+/- days)
- Today
- Upcoming (+3 to +20 days)
- Future (more than 21 days)
- Custom (opens the Dashboard with the custom date filter already showing)
Switch the display date to Created Date and the preset options change to:
- Today
- Yesterday
- This Week
- Last Week
- Custom
- All (this can slow the Dashboard down on accounts with a lot of leads)
4. Email preferences
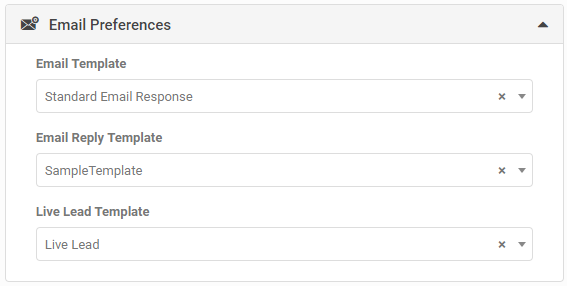
- Email Template: the default template used when sending an Email Response to a customer, from My Emails, Dashboard, View Lead and similar screens. Only templates with type Email Response are selectable.
- Email Reply Template: the default template for an Email Reply, sent when the Track Email Conversation role is on and you are replying a second time to a captured customer response. Only templates with type Email Reply are selectable.
- Live Lead Template: the default template the user gets when sending a Live Leads email from Email Campaigns. Only templates with type Live Leads are selectable.
5. Save and set a password
Click the red SAVE button to save the new user. The account exists at this point, but the user cannot log in to AutoPlay until a password is set.
AutoPlay does not store a password field, so you cannot set one directly in the application. There are two ways to set a password: trigger an email reset from the My User screen, or the user clicks Reset Password on the login screen. See How To Reset Password for the full steps.
6. Role management
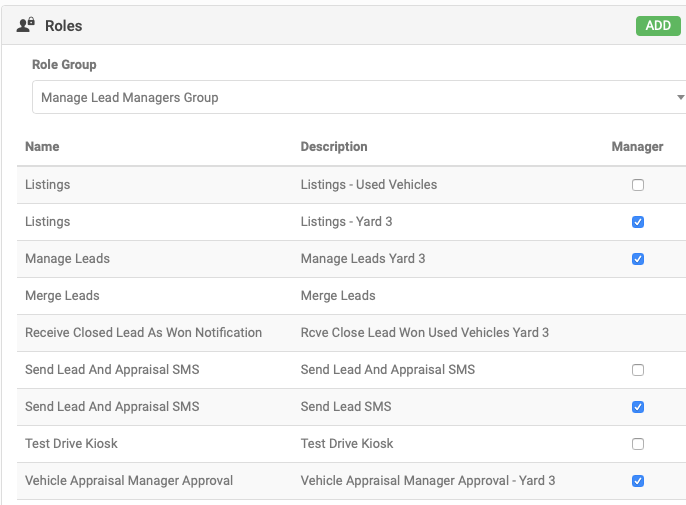
Correct role management is what ensures a user sees the right listings and leads and has access to the right screens. After the first save, the Roles section appears on the My Users screen. From there you can assign a role group to a user or add roles directly, including setting the manager flag.
7. Duplicate users
If a new user is replacing a previous one, do not repurpose the old account: this distorts your historical reporting. Instead, duplicate an existing account to save time on setup.
Duplicating a user also copies their role management, so you do not need to build the new user's roles from scratch. You can review a user's roles in the Roles section, which appears after the record has been saved once.
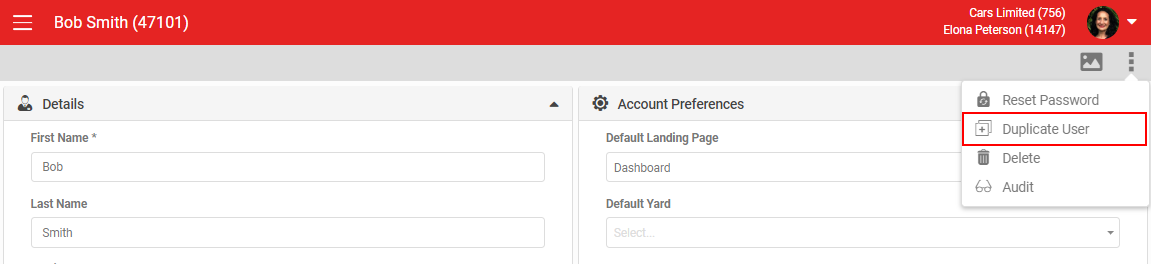
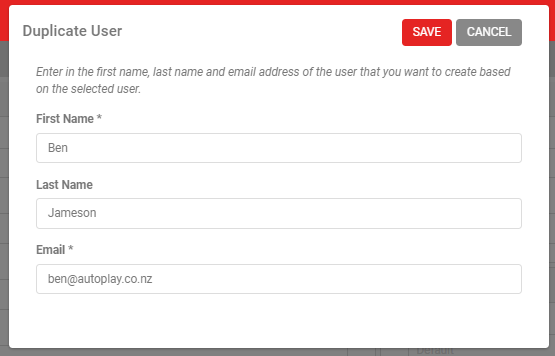
To duplicate a user, click MORE in the grey action menu and select Duplicate User. Enter a first name, last name and email for the new user and click SAVE. Then click Reset Password to email the new user a link to set their own password.
8. Audit
If you have the Audit role, you can view a history of changes via the Audit option in the grey action menu.
9. Notes
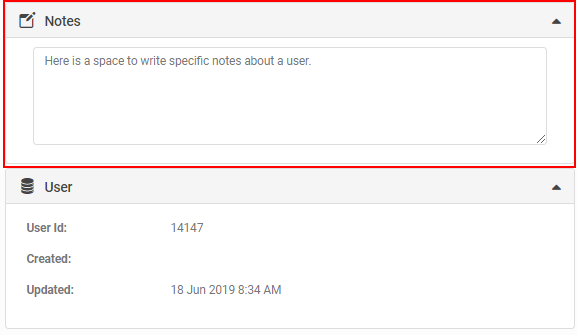
Use the Notes field to record anything specific about a user. AutoPlay may also use this field to flag something unusual about their setup. Notes are visible only on the User screen, nowhere else in the application. Drag the bottom right corner of the field to expand it if you need more room.
10. Save record
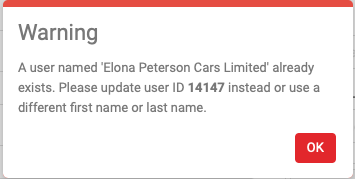
On save, AutoPlay checks that all mandatory fields are completed, and checks that no existing record already has the same first name and last name. If a match exists, you will see an error.