
There are several ways to create a new lead in AutoPlayAuto.com:
- Via Prospect Activity
- Via the Address Book
- Via Listings
- Via the Dashboard
- Via the Appraisals Dashboard or Standalone Appraisals
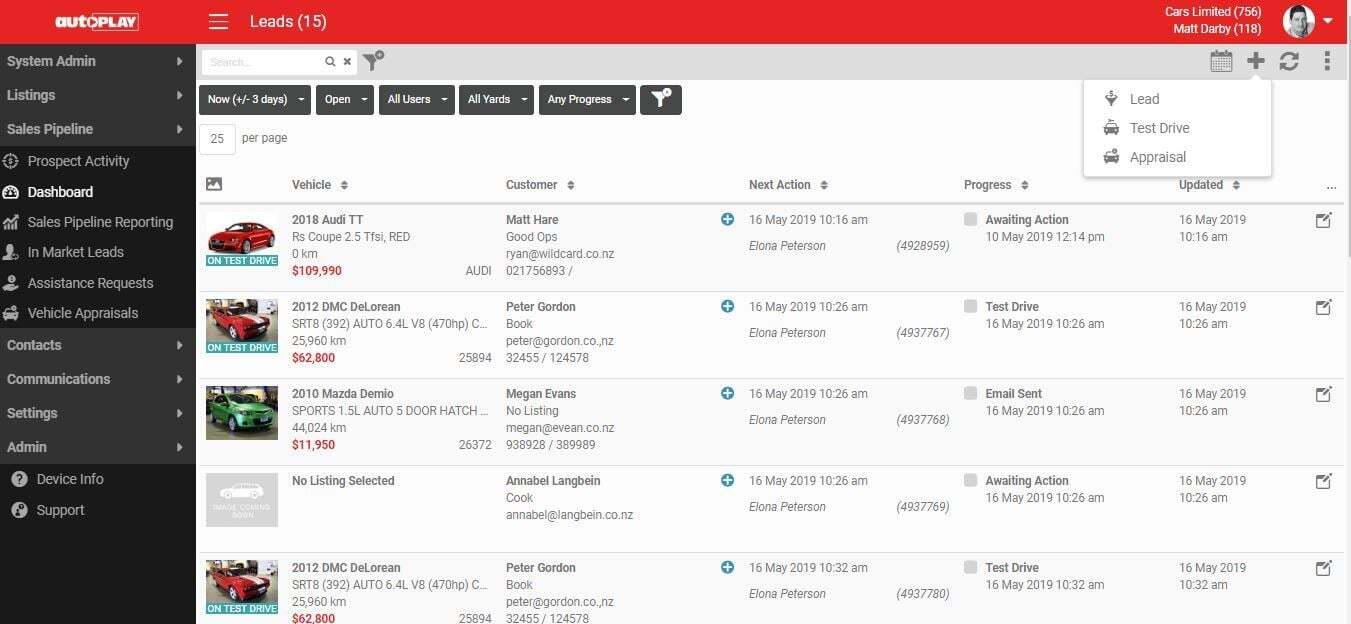
This article covers loading a lead from the Sales Pipeline Dashboard. Click the + icon in the grey action menu and select New Lead.
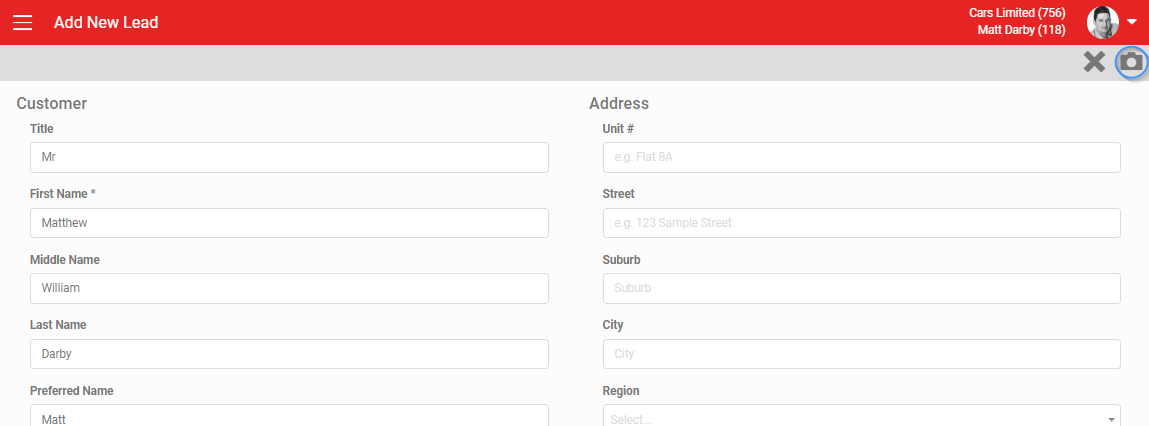
On the Add New Lead screen, type the customer's details manually, or use the built-in driving licence scanner or business card scanner to pick them up automatically. Scanning works on any device with a camera, but works best on a tablet or smartphone. Click the camera icon in the grey action menu to scan. See How To Scan Drivers Licence Or Business Cards for more.
You'll need to grant camera access the first time you scan. If you accidentally decline, search our FAQs for "I Cannot Take Photos".
- To scan a driving licence, choose Driver Licence on the green toggle.
- To scan a business card, choose Business Card on the green toggle.
- Choosing the wrong option for what you're scanning will fail.
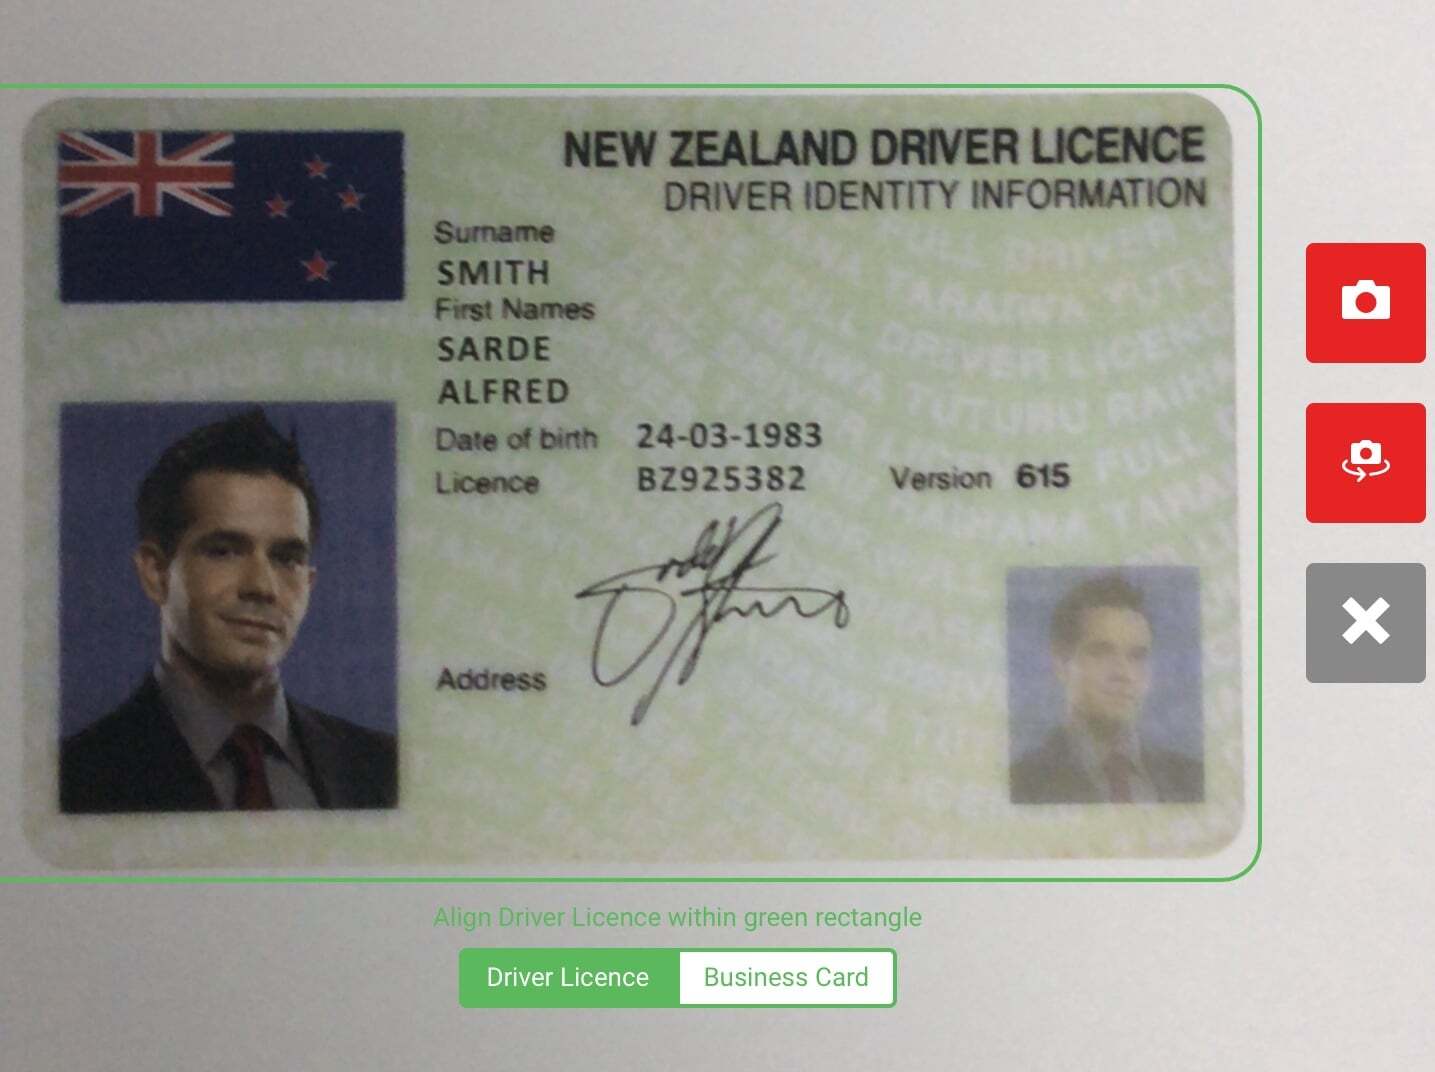
For a successful scan:
- Position the licence or business card within the green frame.
- Keep the device still and stable so the image isn't blurry.
- Use adequate light. Natural light works best.
- Make sure the licence isn't dirty or damaged.
- Business cards with a reflective layer may not scan well.
If all of the above are met and the scan still fails, AutoPlay may not recognise the licence format. Contact AutoPlay Support and we'll look into it with our OCR provider.
You can also search your customer database using the green Lookup button. This searches your entire customer database, including any contacts sent to AutoPlay from a connected DMS/CRM.
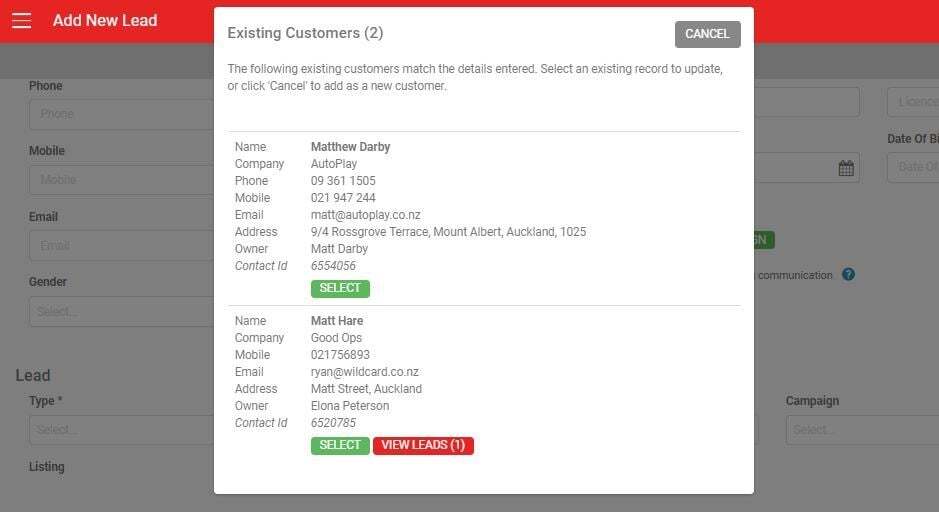
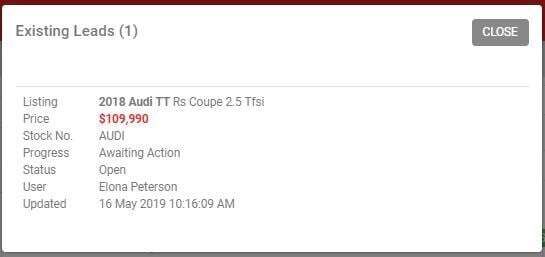
If the customer has open leads, a red View Leads (x) button appears, showing the count. Click it to see a brief summary of each.
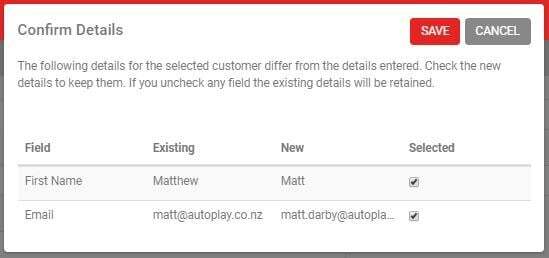
If the customer doesn't already exist, cancel out and continue completing the lead as a new customer record. If a record on the Existing Customer screen matches, click it to select them. Where any entered details differ from the matched record, you'll see a Confirm Details screen:
- Leave a detail ticked to update it on the existing contact.
- Untick a detail to discard what you just entered and keep the existing value.
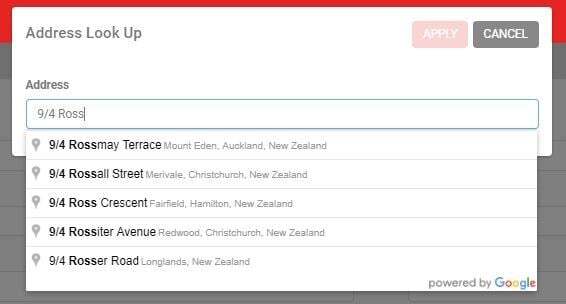
An address picked up from a licence or business card scan populates the address section automatically. Otherwise enter it manually, or click Lookup underneath the address field for a Google lookup.
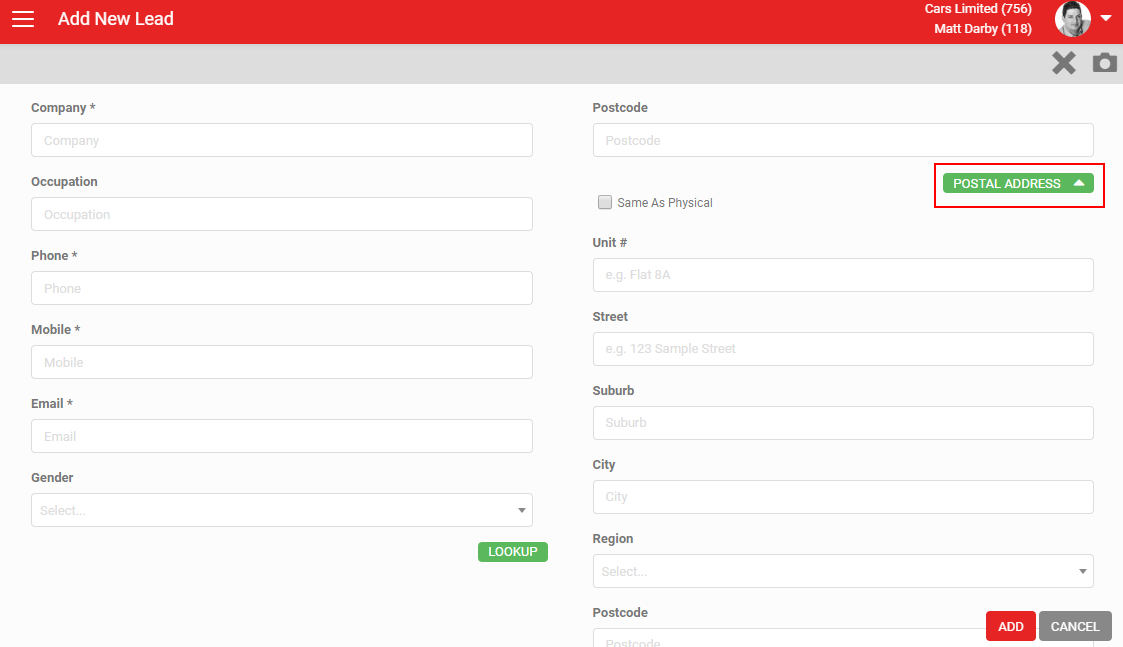
A Postal Address button on the Add New Lead screen is collapsed by default. Click it to reveal the postal address fields, and tick Same As Physical to copy in whatever's in the standard address fields.
If the customer is with you, it's good practice to present the Privacy Policy for them to sign, via the View & Sign button in the Privacy Policy section. The Privacy Policy is a PDF loaded via Settings > Listing Settings > Images. See How To Add A Privacy Policy for more.
If the customer doesn't want marketing communication, untick Opt in to future marketing communication. This flags the contact as Opted Out, stopping bulk emails via Live Leads or Email Campaigns. They can still be sent an individual SMS or Email Response.
The final step is to add some detail about the lead itself:
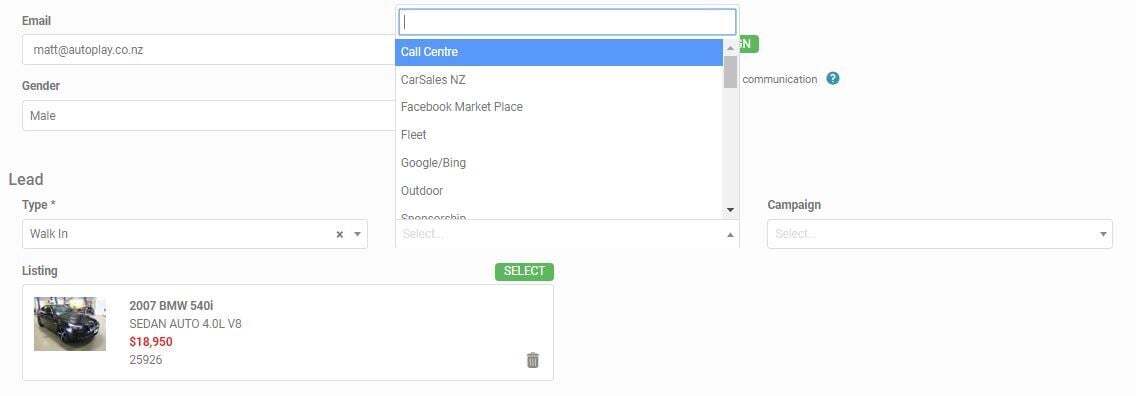
- Type: choose from Email, Phone, Walk In and Other.
- Lead Source: choose one source from those set up in your account. Use the keyword search if the list is long.
- Lead Campaign: as with Source, choose one campaign, searchable by keyword. If a listing is already selected, only campaigns set up for the matching makes are shown.
- Sub Campaign: appears once you've chosen a campaign that has a sub-campaign set up.
- Listing: where possible, qualify the lead to a listing. See How To Add Listing(s) To Your Lead. Search by stock number, rego, make, model or variant, and narrow by yard. The listings you can see are set by your Listings role. Selecting a brochureware listing also searches for similar in-dealer listings; see this article for more.
- Notes: a free-text field for anything relevant to the lead. See How To Add Notes To Your Lead.
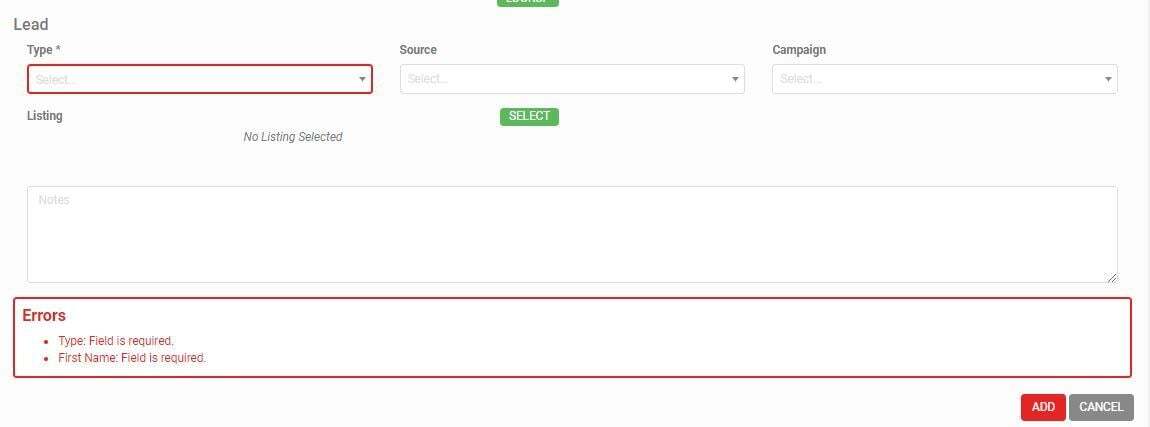
Click Add in the bottom right corner once you've entered everything relevant. Missing mandatory fields are outlined in red, and listed at the bottom of the screen.
The default mandatory fields are one of First Name, Last Name and Company; one of Email, Mobile and Phone; and Lead Type. Mandatory fields are customisable per account. See How To Set Customised Mandatory Fields for more.
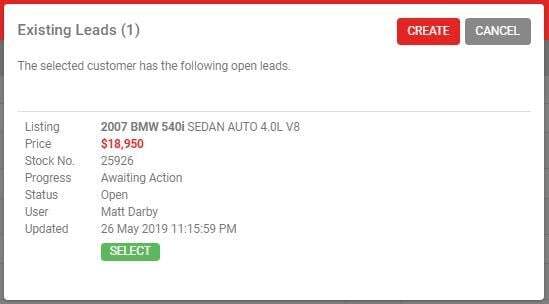
Once all mandatory fields are complete, click Add. If you haven't already searched using Lookup, the system forces a review of matching existing customers before proceeding.
If the selected customer already has an open lead, it's shown here. If you have rights to view it, click Select to open it.
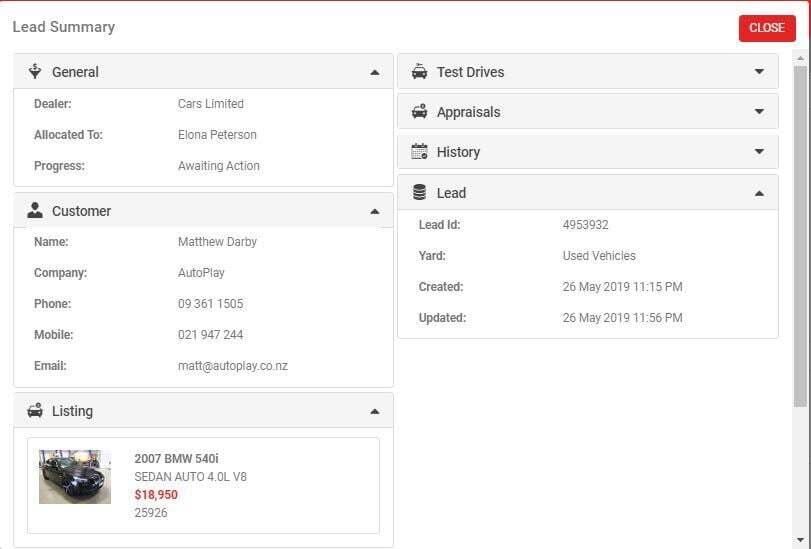
Without role management rights to view that lead, you'll see a Lead Summary popup instead, showing the key details without letting you edit it. See the Manage Leads role for more.
Once you're satisfied you're not creating a duplicate customer or lead, click Create to finish.
What you should see
The new lead now appears on your Dashboard, ready to work.