Since the 22.4.1 release, Lead Labels let you provision and apply custom label tags to leads. Labels help build a fuller picture of the customer journey, highlighting where a lead came from, or a feature added manually after the lead was created, giving salespeople and downstream data users (via the AutoPlay Lead API) a broader view of the customer.
Labels can be provisioned at both a dealership and a dealer group level.
Provisioning and roles
Lead Label role: an account-wide setting that makes Lead Labels visible to all users on the account.
Lead Label Admin screen: to access this screen, a user needs to be a manager in the existing Lead Manager Admin role. Find it under Sales Pipeline Settings > Lead Label Types.
Use the + button on this screen to add a label.
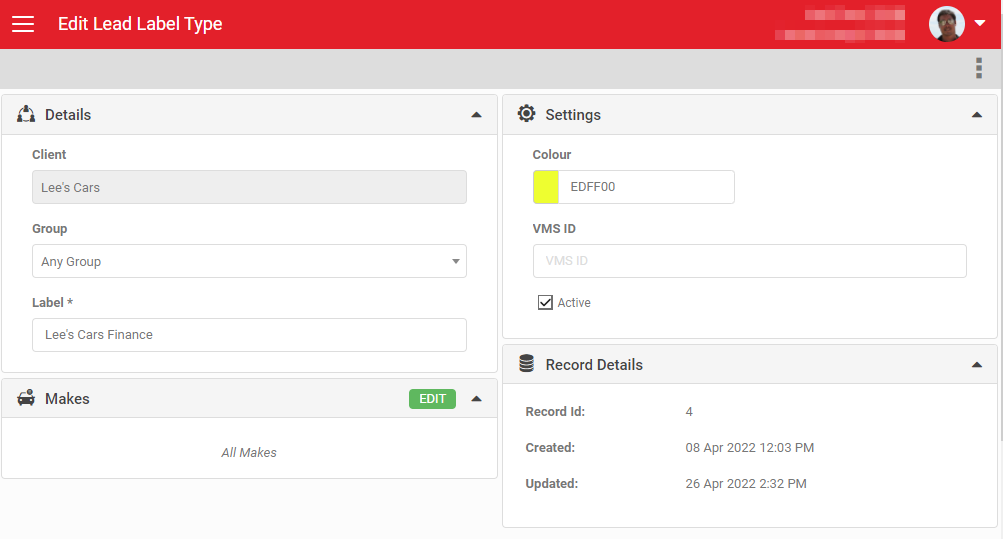
You'll be prompted to set:
- Group: select a dealer group if working from a parent reporting account. Dealerships can select Any Group.
- Label: the text shown on the label.
- Colour: the colour of the label's bubble on the lead.
- VMS ID: an optional field to store a third-party ID.
- Active: when checked, the label is visible on leads. Unchecking a label prompts you to choose whether to remove it from existing leads or leave it attached but inactive.
Adding or removing a label
Lead Labels can be added on ingest, via the AutoPlay Lead API with the correct values submitted, or via an email lead (this needs unique mapping work, so contact Support if you need it), or manually on an existing lead. Labels appear prominently at the top of the lead, with no limit on how many can be added.
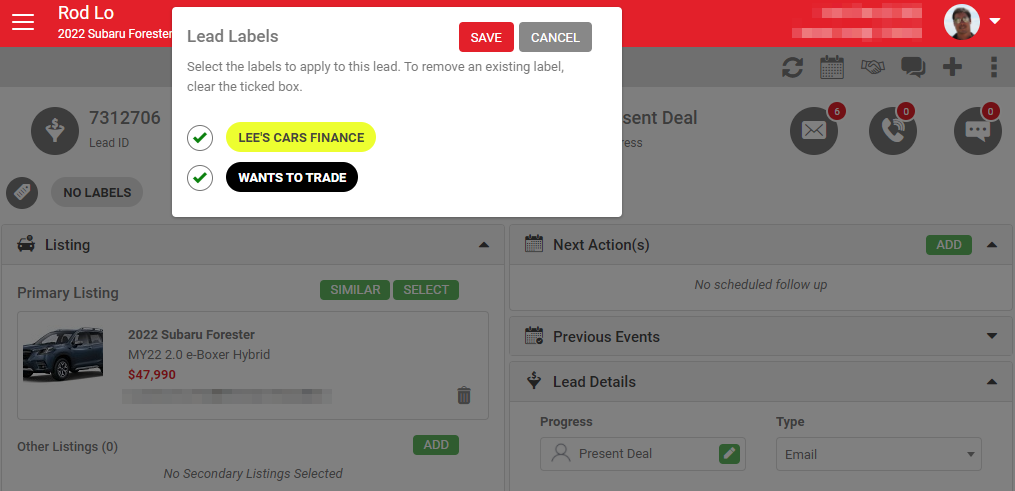
To add or remove a label, select the label tag under the Lead ID on the Lead Detail screen.

This opens a popup where you can select or remove labels from the lead.
Lead Dashboard
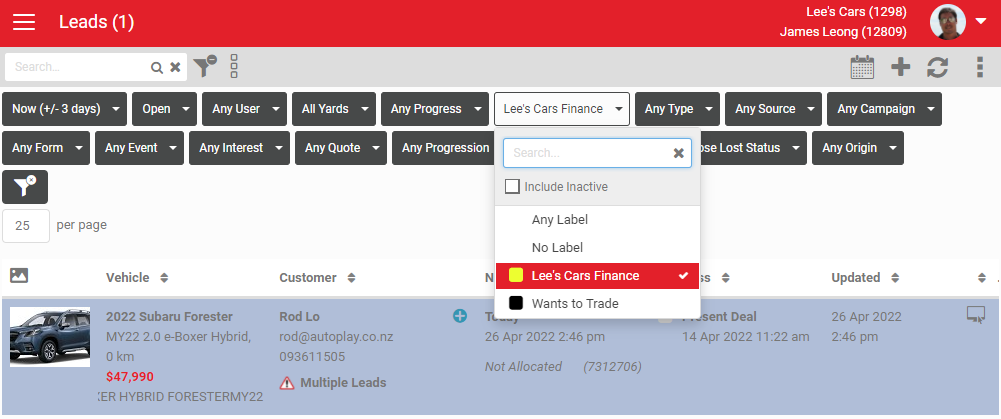
The Lead Dashboard has a new filter for searching by label. Selecting multiple labels acts as an OR search.